[Day 21] bot 指令管理 (一):Cog
接下來,來介紹如何用 Cog 幫助我們管理 Discord BOT 指令們。
進度
今天這個主題算是與 bot 指令框架相關的 (對 bot 不熟的人可以去看 Day 11 的文章 XD),會介紹如何用 Cog 來幫助管理 bot 的指令。
程式碼拆分
在軟體開發中,當一個專案開始變得龐大、複雜時,往往會選擇將功能做拆分,並分門別類做管理。之後再用 import 的方式整合回主程式中。而在 discord.py 中,也有類似的設計。
當 Discord BOT 功能變得更多更複雜的時候,單純只靠一個 main.py 檔案就存放所有程式碼已經變得不太實際。這時候,除了把某些跟 discord.py 無直接關係的函數拆出去之外 (其實就是一般 python 專案的做法),也可以把多個 bot 指令放進一個 class 中,再拆出去。而這個 class,就叫做 Cog。
Cog
在 discord.py 中,有一個叫做 Cog 的 class,各位可以把它視為 bot 指令的容器 (當然,實際上的功能更多 XD)。使用時,可以整個 Cog 一起 import 到 main.py 主程式中,甚至也可以依照需求加入或移除 Cog (不必重啟主程式)。除此之外,如果再搭配 Extensions,甚至可以做到指令們的「hot-reload」!
不過,Extention 的部分就留到明天再介紹吧!
我一直查不到 Cog 這個詞到底是怎麼來的,英文直翻是「齒輪」,感覺不太合理。如果是縮寫的話,從文件上的描述也看不太出來。想來想去,唯一勉強有機會的大概是「Command group」,如果各位讀者知道的話,歡迎留言跟我說一下!
Cog 的使用
先來看一下 Cog 該怎麼使用。文件上有條列式的整理出幾點重要的規則:
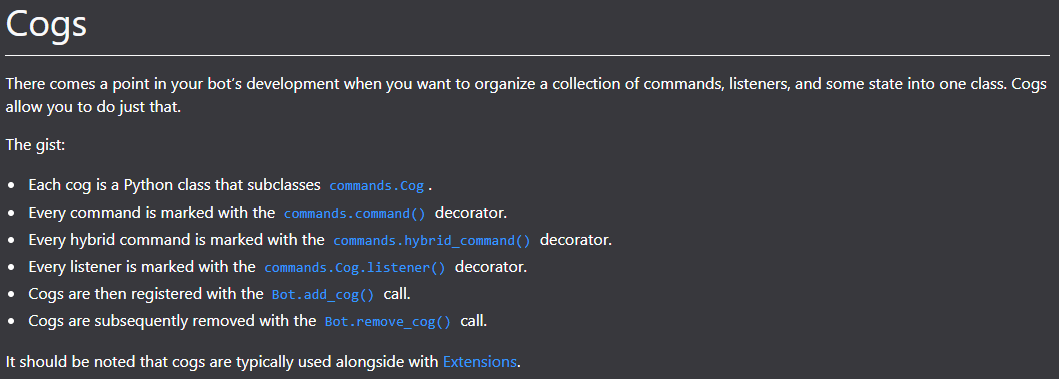
- 每個 cog 都是 commands.Cog 的 subclass
- cog 內的每個 command 的 decorator 都是用 commands.command()
- cog 內的每個 hybrid command 的 decorator 都是用 commands.hybrid_command()
- cog 內的每個 listener 的 decorator 都是用 commands.Cog.listener()
- 加入 cog 請使用 Bot.add_cog()
- 移除 cog 請使用 Bot.remove_cog()
Cog 架構
在看範例之前,先來看一下 Cog 架構
1 | from discord.ext import commands |
如同前面所述,自定義的 cog 都是 Cog 的 subclass,而且在 init 的時候,需要傳入 Bot。後續就再依序球繼續加各種 command、listener。
第一個 Cog
1 | # ping.py |
1 | # main.py |
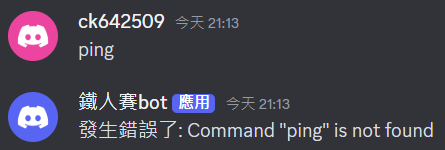
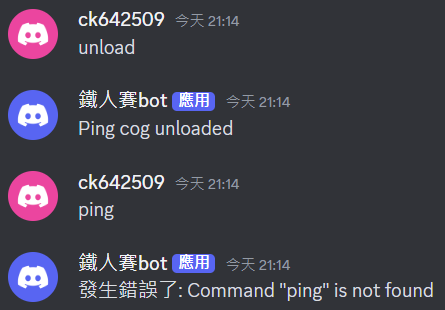
執行後,如果直接輸入 ping,會觸發 CommandNotFound 的錯誤。
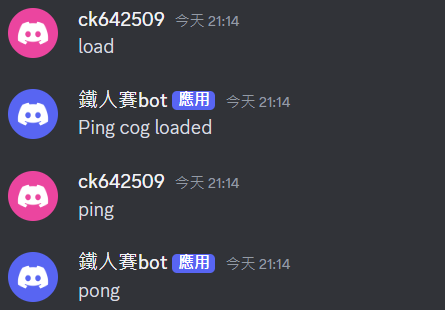
但是,如果輸入 load,就可以使用 ping 了。
此時如果再輸入 unload,就又回到無法使用 ping 的狀態。
發生了什麼事?
這個範例有兩個關鍵,分別是在 load 觸發的 add_cog,以及在 unload 觸發的 remove_cog。
add_cog
顧名思義,就是把 cog 加入到 bot 中。要帶入參數就是 cog 物件。如果只想針對特定的伺服器,可以再加上 guild 或 guilds 參數進行設定。
remove_cog
同理,就是把 cog 從 bot 中移除。需要特別注意的是,remove_cog 要帶入的參數是 cog 名稱,格式是字串 (str)。同樣地,如果只想針對特定的伺服器,可以再加上 guild 或 guilds 參數進行設定。
Cog 名稱
原則上,在 remove_cog 需要使用到的 cog 名稱,就是 class 的名稱。但如果有需要的話,也可以另外設定:
1 | class MyCog(commands.Cog, name='My Cog'): |
Cog 的更多應用
既然都已經把 command 等都整理到一個 class 中,那麼自然也就可以在裡面添加一些屬性或其他自定義的函數。
來看一下這個範例:
1 | class Greetings(commands.Cog): |
執行效果如下:
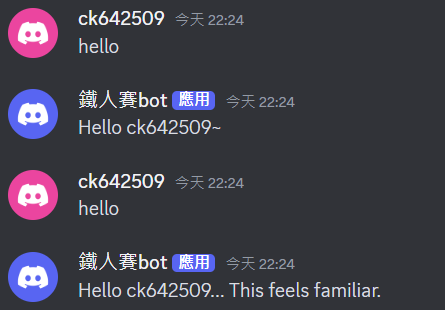
可以看到,連續輸入兩次一樣的 hello 指令,會得到不同的結果。而背後的原因也很簡單,就是有把最後一次呼叫這個指令的人紀錄在 self._last_member 中。每次呼叫的時候,就會去比對是否與 self._last_member 是同一人,再根據結果做出對應的回應。
所以,藉由 Cog 這樣的 class,就可以讓我們更好地去儲存各種狀態,方便後續的使用。
當然,即使不用 Cog,也還是有辦法可以做到相同的效果,只是如果有使用 Cog,就可以把儲存的資訊區隔開來,避免互相汙染,同時也更方便進行管理。
小結
今天介紹了 Cog 的基本使用,包含:建立、載入、移除。明天會繼續介紹 Cog 的好夥伴 Extension。
1 | import discord |
需要把程式碼做適當的切分,再用 import 的方式整合回主程式 main.py 中。
不過,它就是用來解決這個需求的,而且甚至可以跟 Extensions 搭配,做到指令們的「hot-reload」!
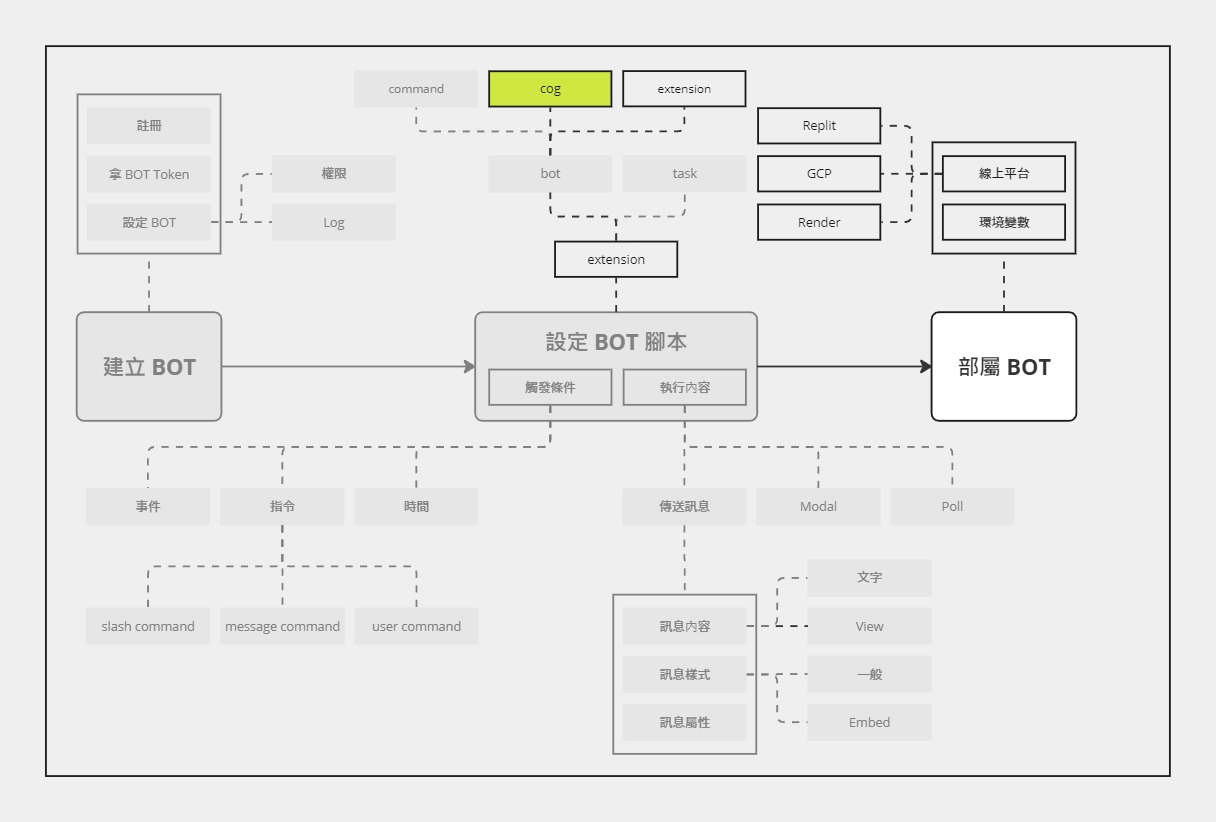
Cog
屬於 extension
Cog 是 discord.py 的一個 class,
會繼承
add_command 會繼承 prefix
add_cog
remove_cog
做一個功能開關
搭配 check?
is_owner
load_extension
reload_extension
unload_extension
extension 本質就是 .py 檔
但一定要有一個 setup 函數,並且這個函數只能有一個參數 bot
https://discordpy.readthedocs.io/en/stable/ext/commands/extensions.html
setup 裡面可以簡單用 bot.add_command
也可以用 bot.add_cog
要用 extension 的時候,就使用 bot.load_extension(“檔名”)