昨天介紹了如何用 Markdown 或是嵌入式訊息 (Embed) 來美化訊息,今天我們來讓訊息可以跟大家互動!
進度
今天會介紹如何在訊息內建立一個簡單的圖形化介面 (View),讓伺服器的成員可以透過訊息跟 Discord BOT 互動。
什麼是 View
簡單來說,View 就是一個容器,可以在 View 裡面擺放可以互動的圖形化元件 (例如:按鈕)。View 的使用方法跟昨天的 Embed 有點像,也是先建立好容器,再把其他元件加進去。
View 裡面可以擺放的圖形化元件其實種類並不多,只有兩種:
- 按鈕
- 下拉式選單
後面都會向大家介紹怎麼使用這些元件的~
第一個 View
讓我們直接看一個極簡單的例子,會更好理解!
1
2
3
4
5
6
7
8
9
10
11
12
13
14
15
| import discord
from discord.ext import commands
intents = discord.Intents.default()
intents.message_content = True
bot = commands.Bot(command_prefix="", intents=intents)
@bot.command()
async def ping(ctx: commands.Context):
view = discord.ui.View()
btn = discord.ui.Button(label="我是按鈕")
view.add_item(btn)
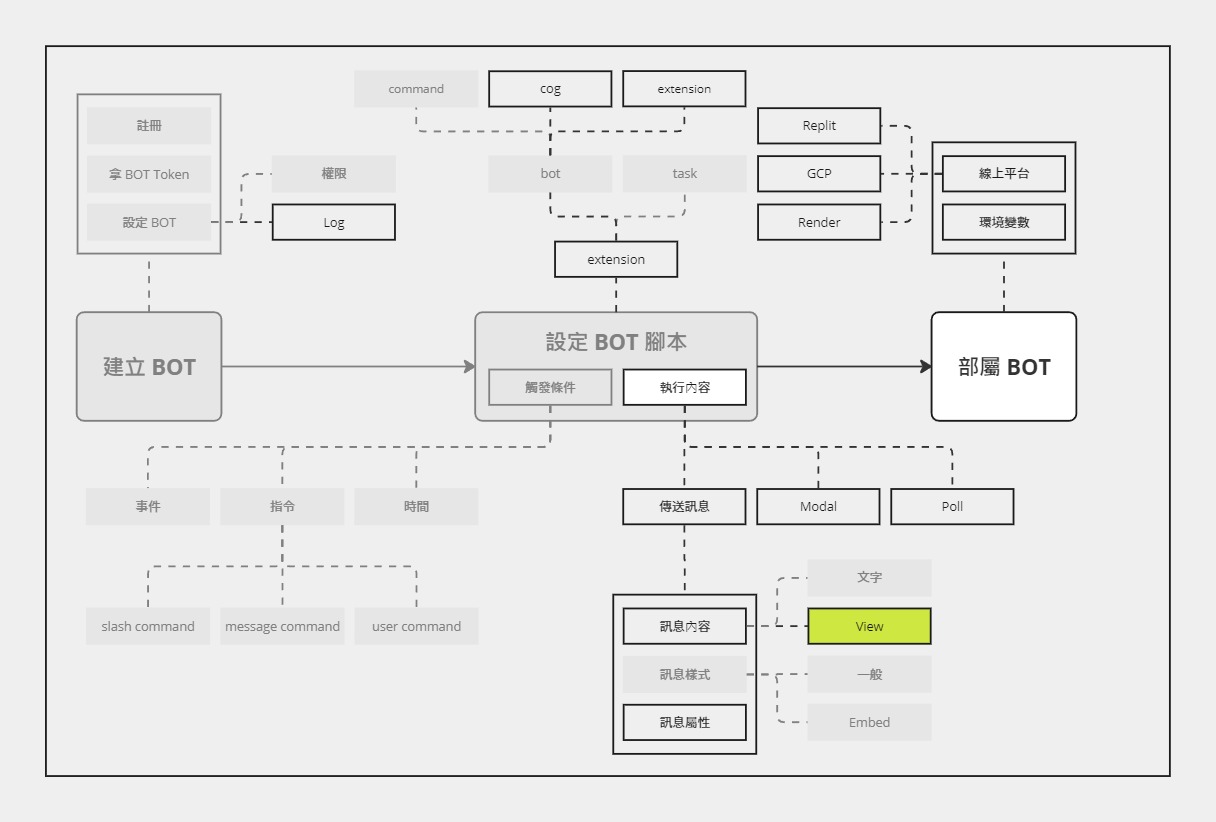
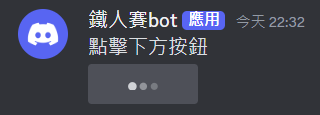
await ctx.send("點擊下方按鈕", view=view)
bot.run("token")
|
效果長這樣:

只不過,現在的按鈕沒有任何功能,按下去之後等待一下就會出現錯誤訊息。
另一種寫法
補充一下,除了上面那種寫法之外,也可以用 class 的寫法。
1
2
3
4
5
6
7
8
9
10
11
12
13
14
15
16
17
18
| import discord
from discord.ext import commands
intents = discord.Intents.default()
intents.message_content = True
bot = commands.Bot(command_prefix="", intents=intents)
class MyView(discord.ui.View):
def __init__(self):
super().__init__()
self.add_item(discord.ui.Button(label="我是按鈕"))
@bot.command()
async def ping(ctx: commands.Context):
view = MyView()
await ctx.send("點擊下方按鈕", view=view)
bot.run("token")
|
效果與上面的範例一模一樣
幫元件加上交互
先前的錯誤指出「交互失敗」,現在讓我們把按鈕的功能加上去。
同樣的,寫法不只一種XD
第一種寫法:callback
最簡單 (也最直覺) 的方式就是使用 callback。
1
2
3
4
5
6
7
8
9
10
11
12
13
14
15
16
17
18
19
| import discord
from discord.ext import commands
intents = discord.Intents.default()
intents.message_content = True
bot = commands.Bot(command_prefix="", intents=intents)
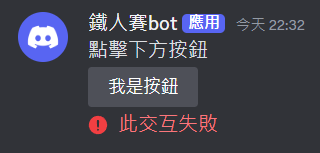
+ async def on_click(interaction: discord.Interaction):
+ await interaction.response.send_message("點擊了按鈕")
@bot.command()
async def ping(ctx: commands.Context):
view = discord.ui.View()
btn = discord.ui.Button(label="我是按鈕")
+ btn.callback = on_click
view.add_item(btn)
await ctx.send("點擊下方按鈕", view=view)
bot.run("token")
|
效果如下:
發生了什麼事?
先建立好一個按下按鈕要呼叫的函數 (on_click) 後,再用 btn.callback = on_click 的方式把它們串連在一起就好了。
第二種寫法:decorator
這種寫法通常會搭配 class 的寫法一起使用。
1
2
3
4
5
6
7
8
9
10
11
12
13
14
15
16
17
18
19
20
21
| import discord
from discord.ext import commands
intents = discord.Intents.default()
intents.message_content = True
bot = commands.Bot(command_prefix="", intents=intents)
class MyView(discord.ui.View):
def __init__(self):
super().__init__()
@discord.ui.button(label="我是按鈕")
async def on_click(self, interaction: discord.Interaction, button: discord.ui.Button):
await interaction.response.send_message("點擊了按鈕")
@bot.command()
async def ping(ctx: commands.Context):
view = MyView()
await ctx.send("點擊下方按鈕", view=view)
bot.run("token")
|
效果與上面的範例一模一樣
畫面感覺有點亂…
要是每次按下按鈕都會回傳訊息的話,很容易造成「洗版」的問題。所以,如果需要多次互動的按鈕,通常會考慮使用「編輯訊息」(然後視情況把按鈕移除),而非發送訊息。
1
2
3
4
5
6
7
8
9
10
11
12
13
14
15
|
class MyView(discord.ui.View):
@discord.ui.button(label="我是按鈕")
async def on_click(
self, interaction: discord.Interaction, button: discord.ui.Button
):
await interaction.response.edit_message(content="剛剛點擊了按鈕", view=None)
@bot.command()
async def ping(ctx: commands.Context):
view = MyView()
await ctx.send("點擊下方按鈕", view=view)
|

按鈕樣式
最後,來看一下按鈕的各種樣式。
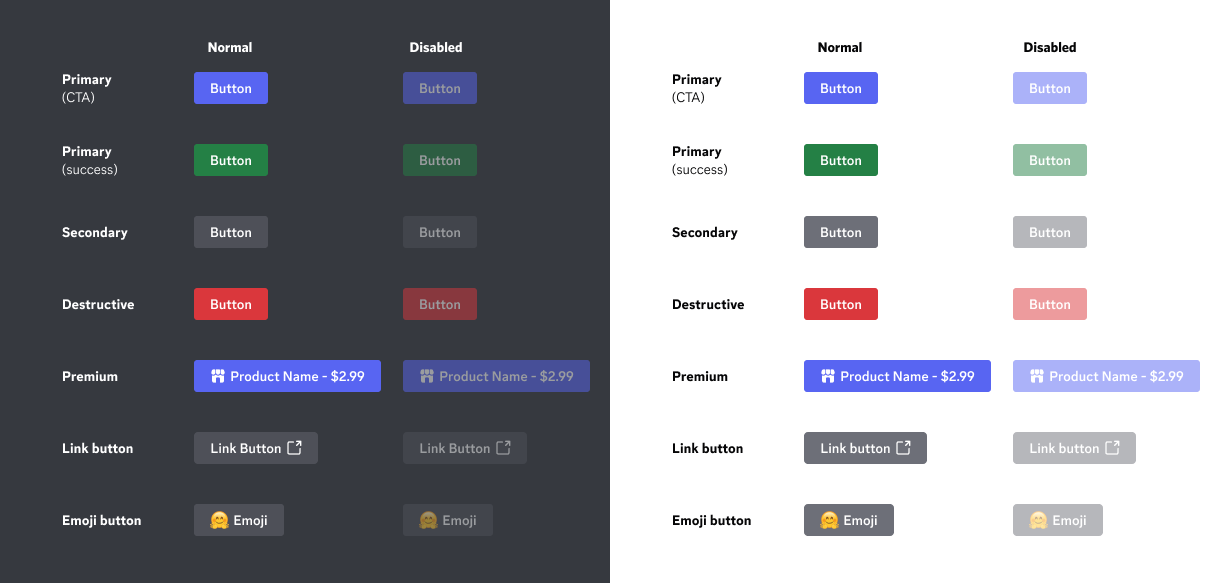
(圖片來源:Discord 文件)
種類其實也不少了,大家可以根據按鈕的功能,在建立按鈕時設置合適的樣式。
小結
今天我們介紹了 View 和一個圖形化元件 ── 按鈕,明天會繼續介紹另一個圖形化元件 ── 下拉式選單。
View 有兩種寫法
先簡單加一個沒有功能的 button
讓 button 有功能
寫法有好幾種
button 樣式
預設 timeout 180s
監聽的話沒有超時的問題?!